安装
去官网下载 Linux的包
注册
到该网站生成一个激活码 https://www.zzzmode.com/mytools/charles/
打开应用,输入激活码
有能力还请支持正版
使用
设置
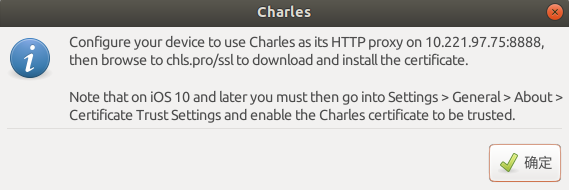
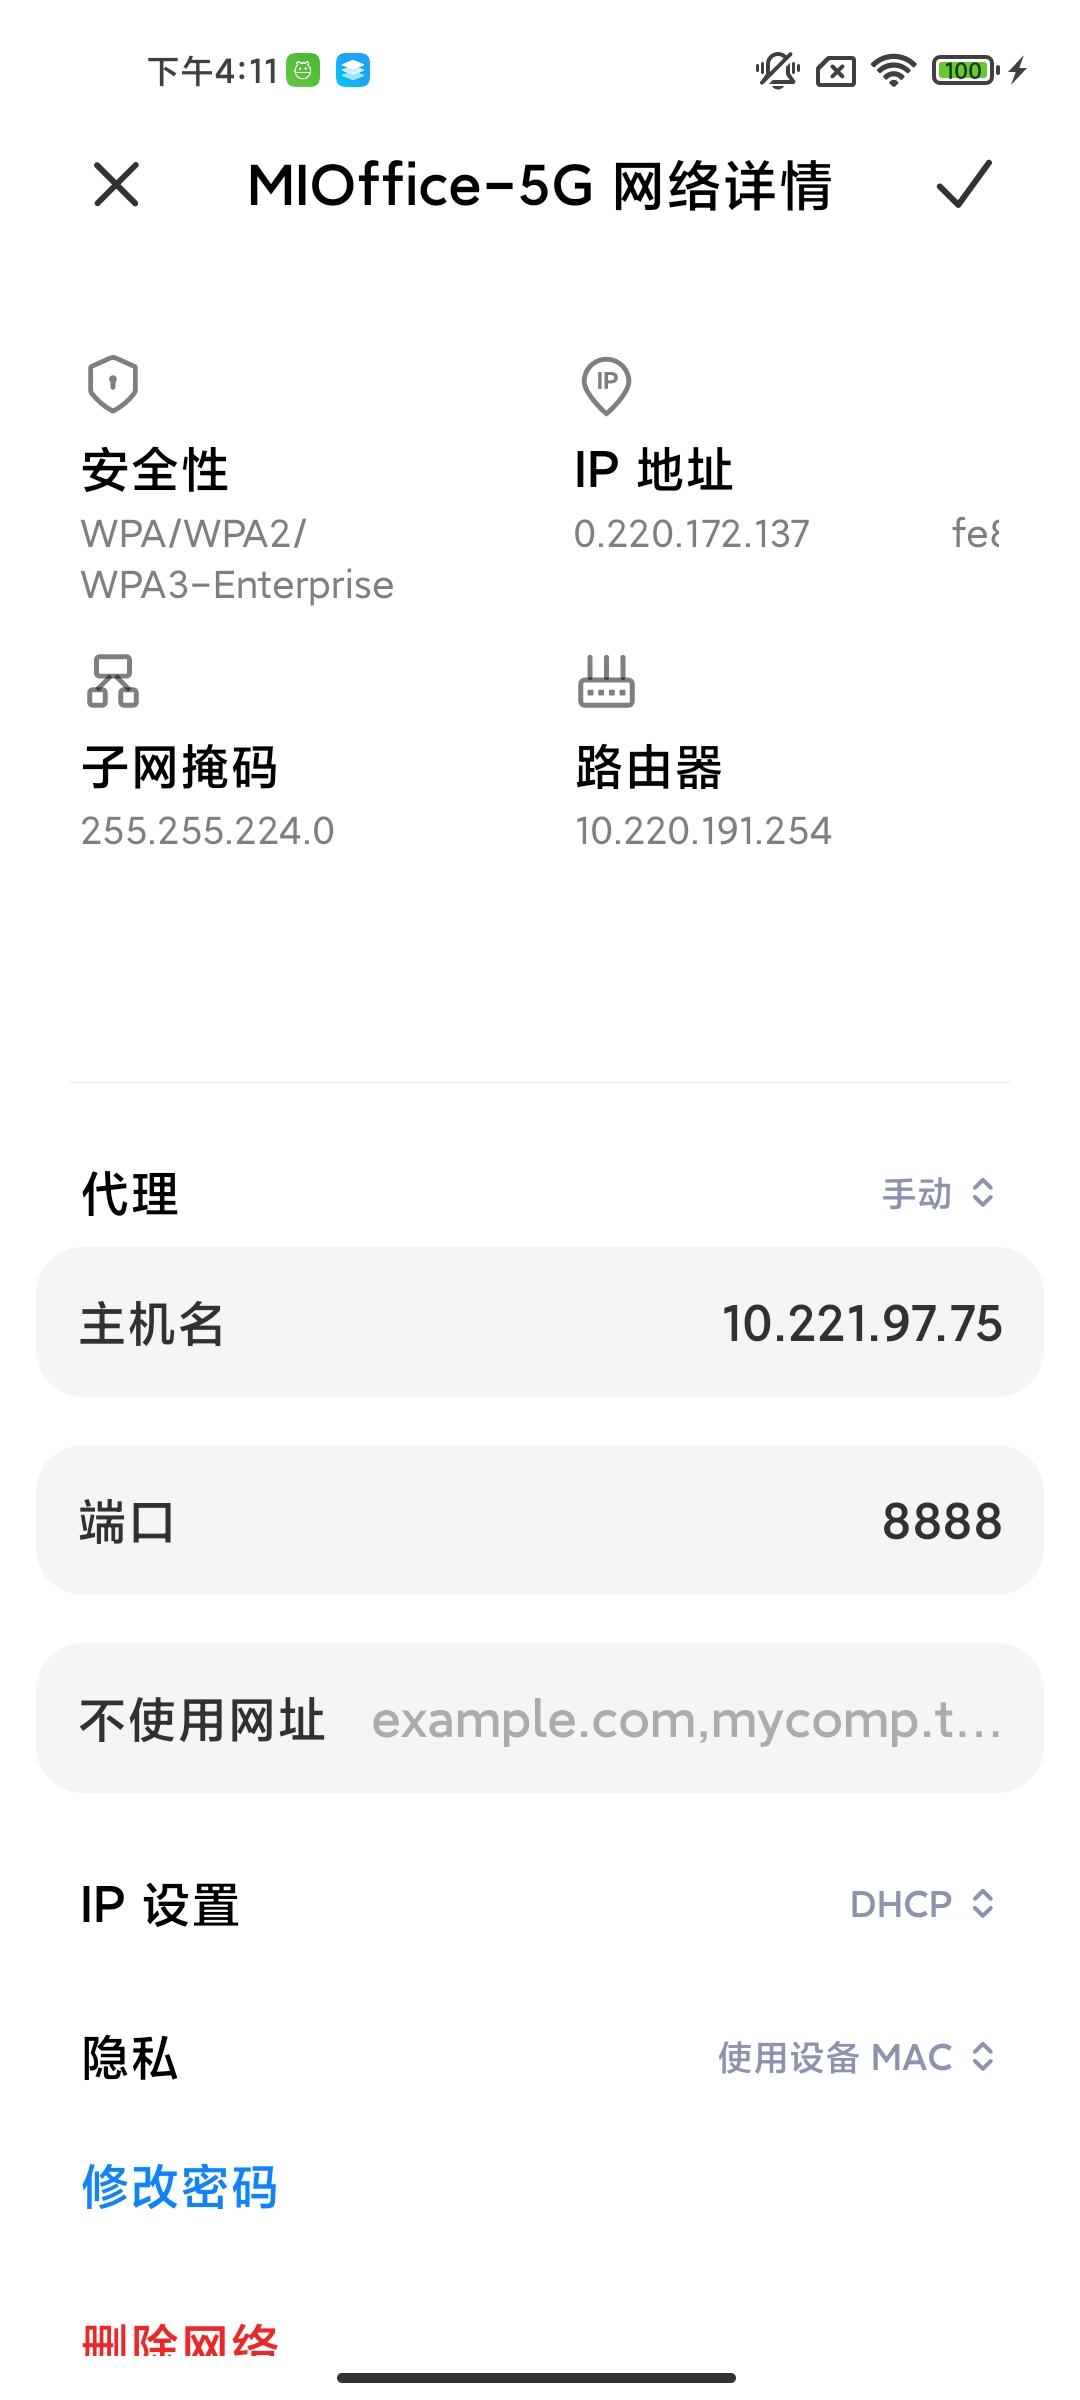
设置使用 Charles 的代理
同一局域网下,连接 WiFi 设置代理
HTTPS抓包
对于Android 7.0及以上的设备HTTPS抓包, 除以上步骤外, 还要额外做一些处理.
主要有2种方式:
(1) ROOT方式
(2) 非ROOT方式
ROOT方式抓包
手机ROOT
去网上找对应机型的ROOT方法
系统证书目录安装SSL证书
前面步骤已经介绍了SSL下载和安装过程.
接下来需要额外做的就是将SSL证书安装到系统证书目录.
(1) 将charles-proxy-ssl-proxying-certificate.pem证书文件上传pull到电脑端.
(2) 运行命令生成md5(第一行数字即为md5)
openssl x509 -subject_hash_old -in charles-proxy-ssl-proxying-certificate.pem.crt
(3) 将pem证书文件更名为 <md5>.0
(4) 将更名后的文件push到手机目录: adb push < md5>.0 /system/etc/security/cacerts
要求有 Root 权限
由于Android 7 以后 system 分区为已读,直接把文件复制过去是不行的。这时可借用magisk 模块把模块目录下的文件挂载到system 分区就行:
https://github.com/azio7/movecert (修复的,自行替换 placeholder 重新打包 zip 刷入即可)
原仓库有问题:https://github.com/Magisk-Modules-Repo/movecert
非ROOT方式抓包
这种方式只能抓取当前APP的HTTPS请求或者其他App设置信任用户CA的情况.
(1) 在AndroidManifest.xml文件中配置android:networkSecurityConfig属性
<?xml version="1.0" encoding="utf-8"?>
<manifest ... >
    <application android:networkSecurityConfig="@xml/network_security_config" ... >
    ...
    </application>
</manifest>
(2) 创建并配置res/xml/network_security_config.xml文件
<network-security-config>
    <base-config cleartextTrafficPermitted="true">
        <trust-anchors>
            <certificates src="system" overridePins="true" /> <!--信任系统证书-->
            <certificates src="user" overridePins="true" /> <!--信任用户证书-->
        </trust-anchors>
    </base-config>
</network-security-config>
然后重新打包安装抓包就可以了.
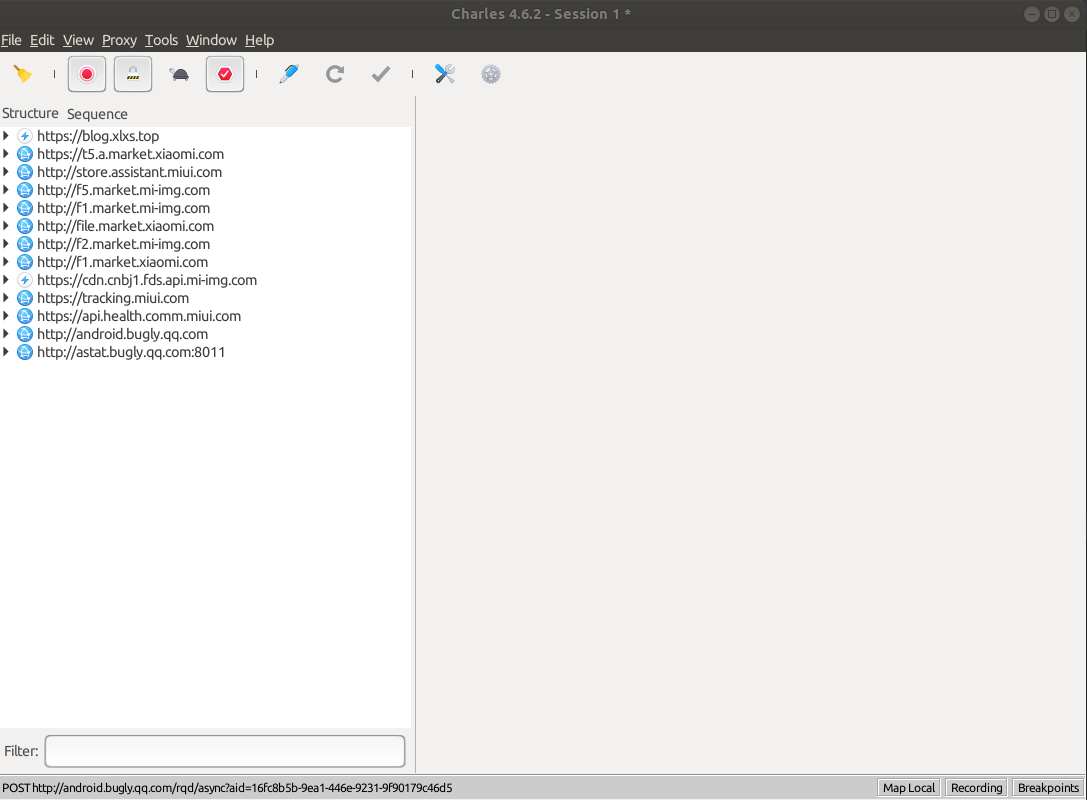
界面查看
断点编辑
Proxy --> BreakPoint Settings
或者右击链接,勾选对应选项
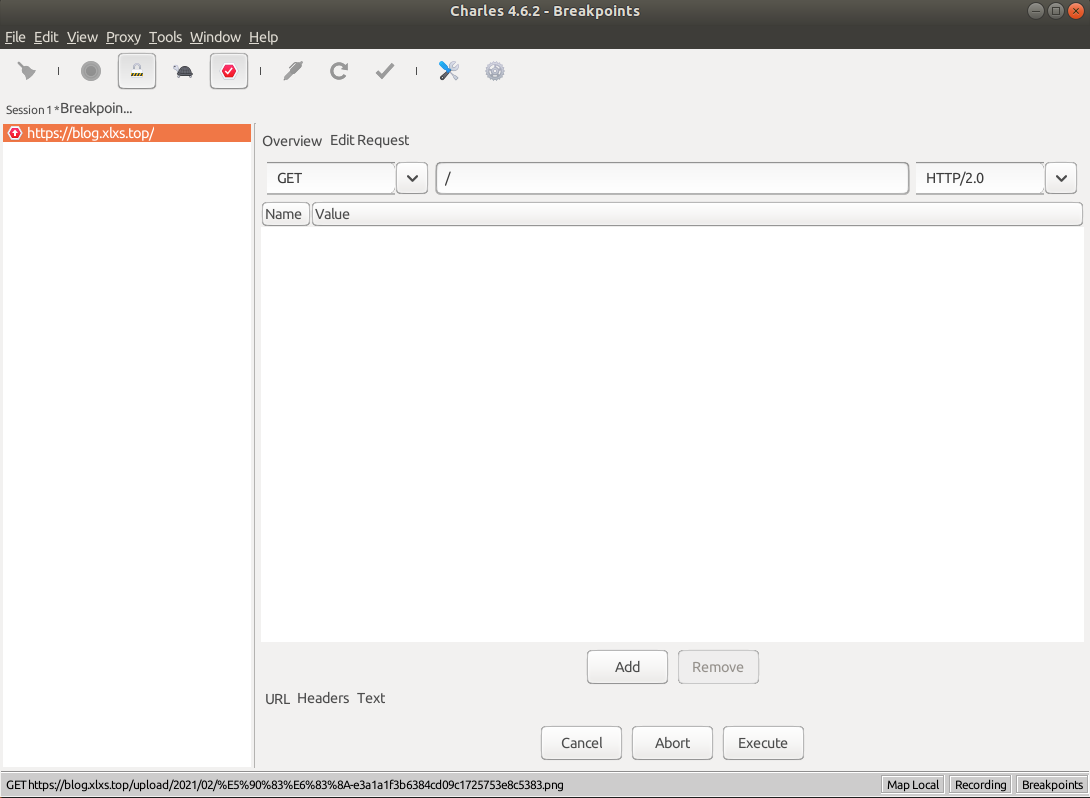
可以自己编辑请求和响应的内容
编辑请求
编辑响应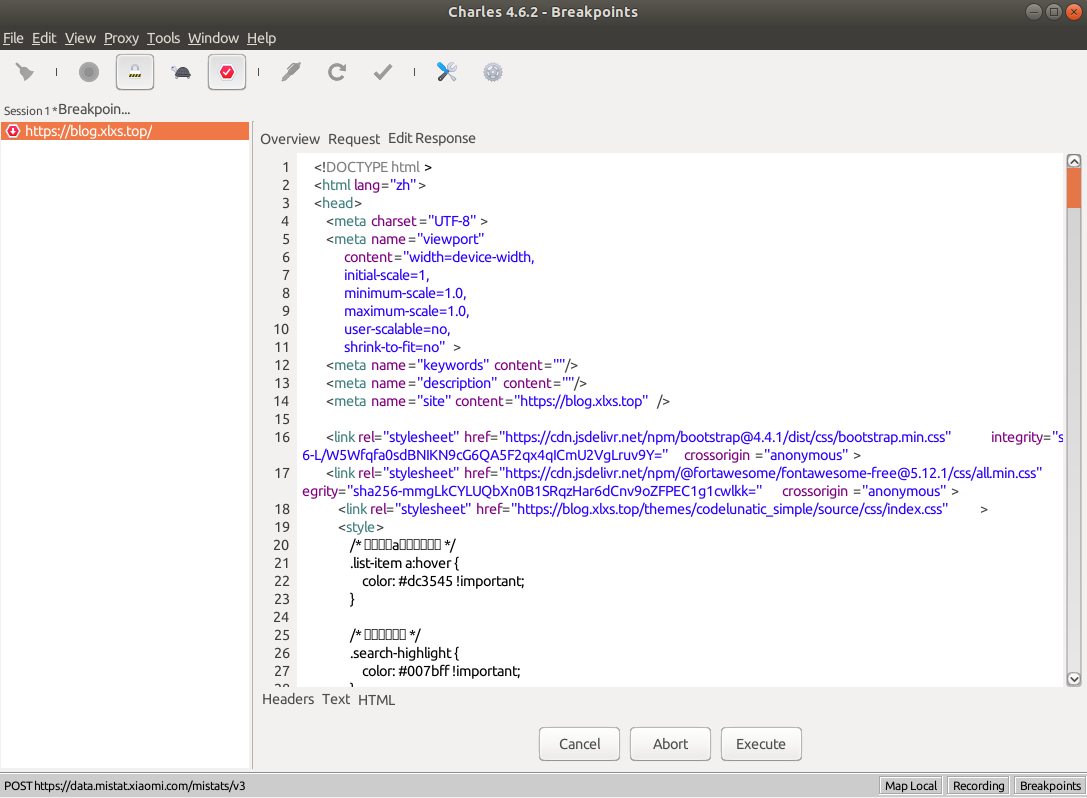
设置本地自定义返回
有时修改返回时,还没改完就请求超时了。这时可将响应存到一个文件,请求后直接返回。
Tools --> Map Local
或者右击链接,勾选对应选项
例如在本地文件放好一个要返回的 json 串
{
  "hasNext": true,
  "pageList": [
    {
      "templateType": 2,
      "generalItems": [
        {
          "implUniqueCode": "wd_0220210806201358012520",
          "abilityCode": "wd_0120210806195102791485",
          "abilityVersion": 2,
          "implType": 1,
          "style": 1,
          "widgetSize": "2*2",
          "widgetImplInfo": {
            "widgetProviderName": "com.tencent.qqmusiccommon.MIUIWidgetProviderRecentPlay",
            "widgetTitle": "最近播放",
            "lightPreviewUrl": "https://cdn.cnbj1.fds.api.mi-img.com/mag-developer/2e0b630e-91d6-4e84-994b-a8ead095c804.png?f=webp",
            "darkPreviewUrl": "",
            "installStatus": 0,
            "appName": "QQ音乐",
            "appIcon": "http://file.market.xiaomi.com/download/AppStore/0b73f0936b892423cb0def79ea030b3266b2654bb",
            "appPackage": "com.tencent.qqmusic",
            "appVersionName": "10.16.5.9",
            "appVersionCode": 2269,
            "appDownloadUrl": "mimarket://details/detailfloat?id=com.tencent.qqmusic&nonce=-2283399555579345375:27212072&ref=xiaomi_me_widget_auto_download&startDownload=true&appClientId=2882303761517502385&finishWhenDownload=false&finishWhenOpen=false&show_cta=true&appSignature=Yju6ZWnkz_AdUynsMTlAc4o5xnDT_tpiuI14_7UnA1s",
            "desc": "你听过的都在这里",
            "appWidgetWidth": 110,
            "appWidgetHeight": 110
          },
          "mamlImplInfo": {
            "productId": null,
            "tagName": null,
            "tag": null,
            "mamlTitle": null,
            "mamlSize": null,
            "appName": "QQ音乐",
            "appIcon": "http://file.market.xiaomi.com/download/AppStore/0b73f0936b892423cb0def79ea030b3266b2654bb",
            "appPackage": "com.tencent.qqmusic",
            "appVersionName": "10.16.5.9",
            "appVersionCode": 2269,
            "lightPreviewUrl": null,
            "darkPreviewUrl": null,
            "desc": null,
            "mamlVersion": null,
            "mamlWidth": null,
            "mamlHeight": null,
            "canEdit": null,
            "mamlDownloadUrl": null,
            "mtzSizeInKb": null
          }
        },
        {
          "implUniqueCode": "wd_0220210709102631012943",
          "abilityCode": "wd_0120210709102604023334",
          "abilityVersion": 2,
          "implType": 1,
          "style": 1,
          "widgetSize": "2*2",
          "widgetImplInfo": {
            "widgetProviderName": "com.douyu.module.miuiwidget.widgetprovider.DYMIUIWidgetFollow22Provider",
            "widgetTitle": "我的关注",
            "lightPreviewUrl": "https://cdn.cnbj1.fds.api.mi-img.com/mag-developer/45a2eec2-7722-473f-9a51-e5b2ca17063e.png?f=webp",
            "darkPreviewUrl": "https://cdn.cnbj1.fds.api.mi-img.com/mag-developer/88feada5-8f4d-43cd-afb6-be0509aedfac.png?f=webp",
            "installStatus": 0,
            "appName": "斗鱼",
            "appIcon": "http://file.market.xiaomi.com/download/AppStore/06dd3d5b53caa44999242c8d04c8927d350bb6c41",
            "appPackage": "air.tv.douyu.android",
            "appVersionName": "7.1.0",
            "appVersionCode": 10710001,
            "appDownloadUrl": "mimarket://details/detailfloat?id=air.tv.douyu.android&nonce=-6155946856269318880:27212072&ref=xiaomi_me_widget_auto_download&startDownload=true&appClientId=2882303761517502385&finishWhenDownload=false&finishWhenOpen=false&show_cta=true&appSignature=WX-Mm7kAjxdp_MSlf2GCgP_x7ZwrK0Eu_S_Ttfd68xo",
            "desc": "快速查看你关注的主播,精彩瞬间不错过",
            "appWidgetWidth": 147,
            "appWidgetHeight": 147
          },
          "mamlImplInfo": {
            "productId": null,
            "tagName": null,
            "tag": null,
            "mamlTitle": null,
            "mamlSize": null,
            "appName": "斗鱼",
            "appIcon": "http://file.market.xiaomi.com/download/AppStore/06dd3d5b53caa44999242c8d04c8927d350bb6c41",
            "appPackage": "air.tv.douyu.android",
            "appVersionName": "7.1.0",
            "appVersionCode": 10710001,
            "lightPreviewUrl": null,
            "darkPreviewUrl": null,
            "desc": null,
            "mamlVersion": null,
            "mamlWidth": null,
            "mamlHeight": null,
            "canEdit": null,
            "mamlDownloadUrl": null,
            "mtzSizeInKb": null
          }
        }
      ]
    }
  ]
}
弱网模拟
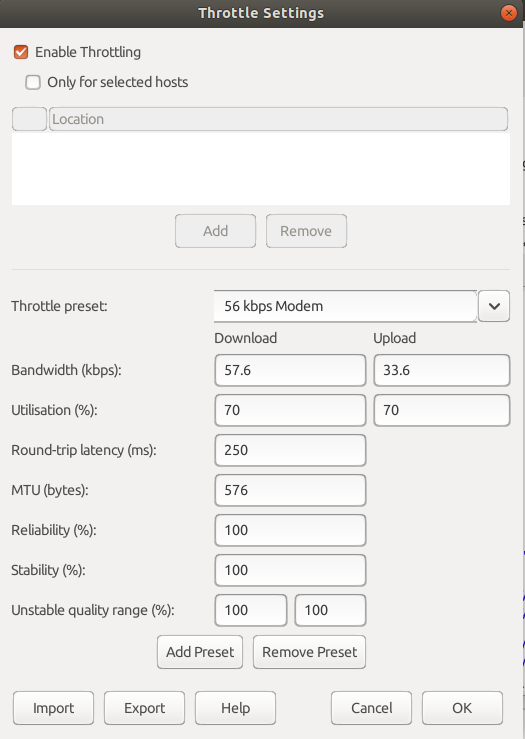
Proxy --> Throttle Settings
在 Throttle preset 可以设置网速的阈值
加密数据修改
有时拦截到的数据是加密的,也可以修改。通用思路如下
- 先解密
- 再修改
- 再加密
AES 加密只要拿到密钥就好,SHA1 加密有自己方的私钥解密就好,公钥比较好拿到。查看加解密过程可以看 OKHTTP 的 加解密拦截器的实现,可以看到密钥信息。自己在 idea 建一个 Java项目来实现加解密
应用请求了但没有捉到包
可能是多次请求失败了,应用选择了不走代理的方法,可以选择结束进程再重新打开。或者应用一开始就是不走代理,例如 flutter 的应用,需要手动配置
